Saturday, January 9, 2021

millis and micros library for AVR microcontrollers - milliseconds and microseconds time tracking

Having precise timing in microcontrollers is important in many projects. For this you can use the two libraries presented in this article - millis & micros.

millis library triggers a timer interrupt every 1 millisecond and increments the milliseconds variable. The user can select the size of the milliseconds variable ranging from char (8 bits) to long long (64 bits) with an overflow from 255 milliseconds to 584.9 million years.

micros library is almost the same as millis but for microseconds. The overflow is between 255 microseconds and 584942 years.

For both libraries the user can select which timer to use: Timer0, Timer1, Timer2, Timer3 or Timer4.

In the case of millis library, it is recommended that other interrupts take less than 1 millisecond to complete otherwise the millis timer interrupt will be delayed. For the micros the ISRs must finish in less than 100 microseconds. The faster the CPU clock the better.

For the milliseconds and microseconds variable decide if you really need a 32 or 64 variable (long and long long) because the bigger the variable the longer it takes to increment it. For example on a 1MHz CPU it takes about 77 microseconds to increment a long long variable.

millis & micros library for AVR microcontrollers


Thursday, January 7, 2021

ISP programming rig for microcontrollers

I had to program many types of microcontrollers over the years and so I was thinking why not build a simple programming rig to make things easier. This rig is for the In-system programming (ISP) method and not for the UART method.

How to easily upload the code to any microcontrollers using ISP rig

The board in the above image is not the programming rig but a digital clock shown as an example. Notice the 6 pin header near the cap. The pins are not soldered through hole but on SMD pads. This way it can be easily de-soldered after finishing the project and on some space constrained projects this is a must.

Monday, November 9, 2020

Constant current LED driver using ATtiny13 - Headlamp flashlight

Here is a simple constant current source for driving 7 white 5mm LEDs and also 2 red LEDs. I have made the circuit for a headlamp flashlight that had a soft button which required a microcontroller. To save the battery life the microcontroller is powering down when the lights are off with a current draw of only 0.3uA.

Constant current LED driver using ATtiny13 - Headlamp flashlight

Thursday, October 15, 2020

Capacitive transformerless power supply schematic for PIR motion sensor NV-1111.35

In the previous article I have explained how a PIR motion sensor works. There you can also find the schematic for the NV-1111.35 PIR sensor which is based on a popular three stage op-amp topology. Understanding this can help you understand other pyroelectric sensors as well.

This sensor is powered by a capacitive transformerless power supply with an output of 8V and 7mA of current.

Capacitive power supply for pyroelectric (PIR) sensors

Sunday, October 11, 2020

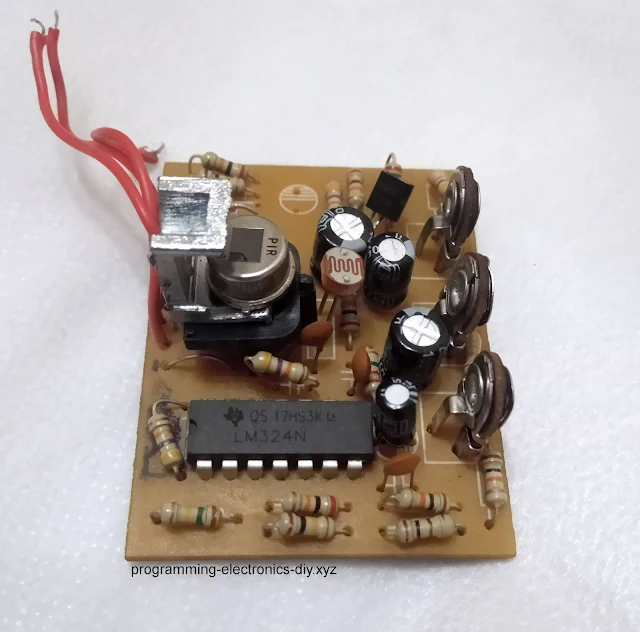
How an outdoor motion PIR sensor switch works with schematic

In this article I will be explaining how a pyroelectric (PIR) sensor works and show the reverse engineered schematic simulated in LTspice. The schematic is for NV-1111.35 outdoor PIR sensor used to switch a mains light and has 3 potentiometers for setting SENSITIVITY, LUX and TIMEOUT.

This sensor is based on a popular three stage op-amp topology. Understanding this can help you understand other pyroelectric sensors as well and also something about active filters using LM324 and removing and setting a DC voltage bias.

Outdoor PIR sensor board repair

Outdoor PIR sensor board repair


Monday, September 28, 2020

Using USBTinyISP programmer with Atmel Studio 7 | AVR programming

In the last article I talked about Programming any AVR microcontrollers using WinAVR and USBTinyISP but recently I found that USBTinyISP can be easily used together with Microchip Studio.

For microcontrollers that are using UPDI interface for programming, I have another tutorial here.

Using USBTinyISP programmer with Atmel Studio

Using an external programmer in Microchip Studio 7

Friday, September 4, 2020

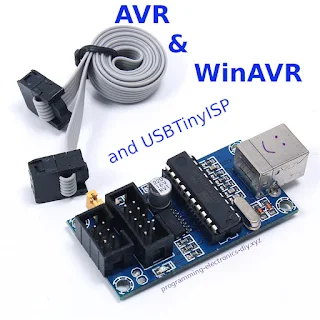
Program any AVR microcontroller using WinAVR and USBTinyISP - Getting started with AVR tutorial for beginners

Nowadays Arduino is the platform of choice for programming AVR microcontrollers and for good reasons. But there are times when you want to have full control over what is added to your code. 

For example Arduino is enabling by default Timer0 for use in millis function and other functions and includes some interrupt routines that perhaps your project is not using and so adding to the code size or perhaps those interrupts can interfere with your code.Two main alternatives are WinAVR and Atmel Studio. This tutorial covers WinAVR because it's simpler to use for a beginner.

What you will need:

  • ATmega328P (used in this tutorial as an example)
  • USBTinyISP programmer 
  • WinAVR software (more on this later)

What you can learn:

  • how to program an AVR microcontroller using an In-System Programmer such as USBTinyISP and WinAVR
  • some bitwise operations for handling the registers

There are two main ways to program a microcontroller:

- ISP (In System Programming) using SPI protocol and a ISP programmer
- With a bootloader using UART protocol and a USB to Serial programmer. Some microcontrollers come with a bootloader already pre-programmed on them.
 
This tutorial will cover the ISP programming way.

Programming software

There are many tools for programming an AVR microcontroller such as Atmel Studio, PlatformIO, Eclipse with an AVR plugin, etc but the simplest and light weight solution that I found is using WinAVR.

Programming hardware

Apart from development software there is also the need of a hardware programmer that the software uses to communicate with the microcontroller and upload the code to it. Searching online for 'avr programmer' reveals lots of options. The most popular I believe is the USBTinyISP and is very cheap. There is also Atmel-ICE from Atmel. A bit more expensive but it has the benefit of being able to debug and see in real time what happens inside the microcontroller.


WinAVR and USBTinyISP - Getting started with AVR


Getting started with WinAVR